Azure Virtual Desktop (AVD) gives your team secure access to desktops and applications from anywhere, on any device. As a comprehensive desktop and app virtualization service, AVD handles everything from remote desktop delivery and virtual machines to Azure Active Directory (Azure AD) integration for centralized management. Your data and applications stay securely managed in the cloud while your workforce stays productive.
This guide takes you through the essentials of setting up and utilizing Azure Virtual Desktop effectively. You will learn how to prepare for setup, from ensuring you have the necessary prerequisites to understanding how to connect Azure Virtual Desktop with Azure AD for streamlined user management. Following this, we delve into creating a host pool and session hosts, configuring remote access that enables your users to work from anywhere, and publishing and managing applications. To ensure you can maintain and optimize your Azure Virtual Desktop environment, we also cover monitoring and troubleshooting practices. By the end of this guide, you will be equipped with the knowledge to implement, manage, and troubleshoot your Azure Virtual Desktop deployment, ensuring your remote desktop and virtual machines are running efficiently.
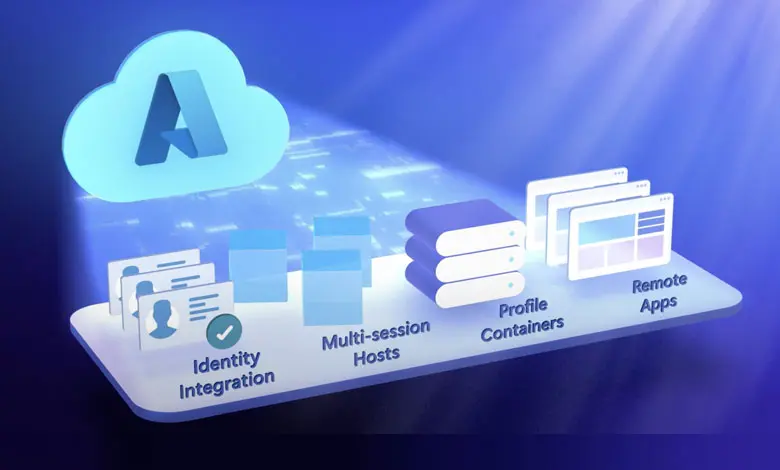
What is Azure Virtual Desktop?
Azure Virtual Desktop (AVD), previously known as Windows Virtual Desktop, is a comprehensive desktop and app virtualization service that operates entirely on the Azure public cloud. This service enables the streaming of a user’s desktop or applications remotely to a device, allowing access from anywhere. It is a pivotal platform for many organizations, integrating seamlessly with Azure Active Directory for streamlined management and supporting a wide range of business processes.
Features and Capabilities
AVD offers a host of powerful features and capabilities designed to meet diverse organizational needs:
-
Windows 10, 11 and Server OS Support: AVD delivers a full Windows experience, providing virtual access to Windows 10, 11, and Windows Server applications and desktops across various devices including Windows, macOS, Android, and web clients.
-
Multi-Session and FSLogix: Utilize Windows 10 and 11 multi-session capabilities to reduce costs by pooling users on single hosts. FSLogix enhances profile management on multi-session hosts, optimizing storage and access speeds.
-
Flexible Infrastructure and Auto-scaling: Organizations can scale their infrastructure up or down based on demand, with options for auto-scaling and shutdown to drive cost efficiencies.
-
Simplified Management: AVD reduces management overhead by eliminating the need for traditional VDI components like Brokers, Gateways, or Load Balancers. Management is centralized through Azure, covering aspects such as images, session hosts, licensing, and identities.
-
Security and Compliance: AVD ensures data security with features like Azure Private Link and RDP Shortpath, and integrates with Microsoft 365 for a cohesive security strategy. For managing secrets and certificates in your AVD environment, see our guide on diagnosing Azure Key Vault access issues.
Use Cases for Azure Virtual Desktop
Azure Virtual Desktop is versatile, supporting various use cases across different industries:
-
Remote Work: AVD enables employees to access their work environments from home or any location without the need for complex hardware setups, thus supporting remote work models and business continuity.
-
Elastic Workforce: Ideal for scenarios such as mergers, acquisitions, or temporary workforce needs, AVD allows for rapid onboarding and offboarding of users.
-
Specialized Workloads: Supports high-performance computing needs such as 3D modeling, financial applications, and software development with options for multi-screen support and personal desktops.
-
Education and Training: Educational institutions can leverage AVD to provide students with access to learning materials and applications from anywhere, facilitating remote learning and reducing the need for physical computer labs.
-
Healthcare: Ensures that healthcare providers can access applications and patient data securely, complying with regulations and protecting sensitive information.
Azure Virtual Desktop not only enhances operational flexibility but also aligns with strategic business objectives to mitigate risks, reduce costs, and drive innovation. Whether transitioning from traditional on-premises setups or expanding virtual capabilities, AVD stands out as a robust solution for modern IT challenges.
Preparing for Setup
To ensure a smooth and successful deployment of Azure Virtual Desktop, it’s crucial to adequately prepare your Azure environment and configure the necessary components. This preparation involves setting up your Azure account, configuring access roles, and ensuring that your session hosts and users are correctly authenticated.
Required Azure Subscriptions
-
Create or Access an Azure Account: You need an active Azure subscription to deploy Azure Virtual Desktop. If you don’t have an Azure account, you can create one for free. This is your first step towards leveraging the capabilities of Azure Virtual Desktop.
-
Assign Azure Role-Based Access Control (RBAC) Roles: Proper permissions are critical for deploying and managing Azure Virtual Desktop. Ensure you assign the necessary Azure RBAC roles as outlined in the Azure documentation. This step is crucial for controlling access and performing administrative tasks within your Azure environment.
-
Register the Microsoft.DesktopVirtualization Resource Provider: Before you proceed, make sure to register the Microsoft.DesktopVirtualization resource provider with your Azure subscription. This registration is necessary to use Azure Virtual Desktop services.
Active Directory Configurations
-
User Authentication with Microsoft Entra ID: To access desktops and applications from your session hosts, user authentication is mandatory. Microsoft Entra ID, a centralized cloud identity service, is used for this purpose. Ensure that your session hosts are joined to the same Microsoft Entra tenant, or to an Active Directory domain using Active Directory Domain Services (AD DS) or Microsoft Entra Domain Services.
-
Join Session Hosts to Microsoft Entra Tenant or Active Directory Domain: It’s essential that the session hosts providing desktops and applications are joined to the same Microsoft Entra tenant as your users or an Active Directory domain (either AD DS or Microsoft Entra Domain Services). This alignment ensures seamless connectivity and access control.
-
Configure Hybrid Identities: If you’re using AD DS or Microsoft Entra Domain Services in your Azure Virtual Desktop deployment, ensure that your user accounts are set up as hybrid identities. This configuration means that the user accounts are synchronized and can authenticate successfully in a hybrid setup.
By following these steps, you will lay a solid foundation for your Azure Virtual Desktop deployment, ensuring that all necessary systems and permissions are in place to facilitate a seamless and secure virtual desktop experience.
Creating a Host Pool and Session Hosts
Defining Host Pools
To create a host pool using the Azure portal, start by signing in. Once logged in, enter “Azure Virtual Desktop” in the search bar and select the matching service entry. Navigate to Host Pools and click Create. On the Basics tab, provide the necessary details:
-
Subscription: Choose the subscription under which you want to create the host pool.
-
Resource Group: You can select an existing resource group or create a new one.
-
Host Pool Name: Assign a name to your host pool, such as “hp01”.
-
Location: Choose the Azure region for your host pool.
-
Validation Environment: If creating a validation environment, select Yes.
-
Preferred App Group Type: Choose between Desktop or RemoteApp. A Desktop application group is created by default.
-
Host Pool Type: Decide if your host pool will be Personal or Pooled.
Configuring Session Hosts
Once your host pool is established, you may want to add session hosts either on Azure or Azure Stack HCI. This process differs slightly depending on the platform.
For Azure:
-
On the Virtual Machines tab, select to expand the Azure section if creating session hosts on Azure.
-
Fill out the following parameters:
-
Resource Group: Defaults to the host pool’s resource group, but can be changed.
-
Name Prefix: Enter a prefix for your session hosts, like “hp01-sh”.
-
Virtual Machine Type: Choose Azure Virtual Machine.
-
Virtual Machine Location: Must match the region of your virtual network.
-
Availability Options: Choose from availability zones, set, or no redundancy.
-
Security Type: Options include Standard, Trusted Launch, or Confidential VMs.
-
Image: Select the OS image from the available options.
-
Virtual Machine Size: Choose a SKU or change the size as needed.
-
OS Disk Type: Typically, Premium SSD is recommended for production.
-
Network Settings: Select your virtual network and appropriate subnet.
-
Directory Join Options: Choose between Microsoft Entra ID or Active Directory.
For Azure Stack HCI:
-
Expand the Azure Stack HCI section if creating session hosts on this platform.
-
Configure the settings:
-
Resource Group: This can be the same as the host pool or a different one.
-
Name Prefix: Like “hp01-sh”.
-
Virtual Machine Type: Choose Azure Stack HCI Virtual Machine.
-
Custom Location: Select the Azure Stack HCI cluster for deployment.
-
Memory and Processor Settings: Define static or dynamic memory and the number of virtual processors.
-
Network Configuration: Choose a network and specify domain join settings.
For both platforms, ensure that the session hosts are configured consistently with the same operating system images and settings to maintain uniformity across the host pool. This setup is crucial for streamlined management and optimal performance of your Azure Virtual Desktop environment.
Configuring Remote Access
To ensure secure and efficient remote access to Azure Virtual Desktop environments, configuring the Remote Desktop Protocol (RDP) and Virtual Private Network (VPN) settings is crucial. Below, you’ll find detailed steps to set up both RDP and VPN configurations that enable seamless connectivity for remote users.
Setting Up RDP
Remote Desktop Protocol (RDP) allows users to connect to Azure Virtual Desktop from various devices. Here’s how you can set up RDP:
- Select the Right RDP Client: Choose from the Microsoft Remote Desktop client versions available:
-
Azure Virtual Desktop app from the Microsoft Store, is currently in preview.
-
Remote Desktop app from the Microsoft Store, primarily for connecting to Remote Desktop Services or a remote PC.
- Install the RDP Client:
- For apps from the Microsoft Store, follow the download and installation instructions provided in the store.
-
Subscribe to a Workspace: After installation, subscribe to your workspace to access desktops and applications assigned by your admin. This subscription ensures that the workspace content updates automatically, reflecting any changes made by the admin.
-
Connect to Your Virtual Desktop:
- Select the desktop or application you wish to access and initiate the connection.
VPN Configuration
Setting up a VPN enhances security by creating a private network across the internet. Here’s how to configure VPN for Azure Virtual Desktop:
- Create a Virtual Network Gateway:
- Configure Point-to-Site VPN:
- For certificate authentication, use PowerShell to create root and client certificates and upload the public certificate data to your VPN configuration.
- Download and Install the VPN Client:
- Install the VPN client on your device, and if required, install the certificates as well.
- Connect to Azure VPN:
- Verify the connection by accessing resources within Azure to ensure everything is configured correctly.
By following these steps, you can configure RDP and VPN settings to ensure secure and reliable access to your Azure Virtual Desktop, allowing users to work remotely without compromising on security or performance.
Publishing and Managing Applications
To effectively manage and publish applications within your Azure Virtual Desktop environment, it’s crucial to understand the process of assigning applications to hosts and managing user access. This ensures that your users have the necessary tools at their disposal and can access them securely and efficiently.
Assigning Applications to Hosts
When setting up your Azure Virtual Desktop environment, you may choose to create a RemoteApp application group. This group allows you to manage applications separately from the desktop environment. Here’s how you can assign applications to your hosts:
-
Create a RemoteApp Application Group: Begin by creating an application group specifically for RemoteApps within your Azure Virtual Desktop environment. This is done in the Azure portal where you manage your host pools.
-
Add Applications to the Application Group: Once the RemoteApp application group is established, you can add applications to it. Ensure that these applications are installed on the session hosts that are part of the host pool associated with this application group.
-
Assign Users or Groups: After adding the applications, assign users or user groups to the application group. This step is crucial as it defines who can access the applications. You can manage these assignments directly in the Azure portal.
By following these steps, you ensure that the right applications are available on the appropriate session hosts and accessible to the intended users.
Managing User Access
Managing user access is integral to maintaining the security and efficiency of your Azure Virtual Desktop environment. Here’s how you can manage user access effectively:
-
Assign Users to an Application Group: If you have created an application group, either during the initial host pool setup or afterward, you need to assign users to this group. This allows them to access the applications published in that group.
-
Use Azure Role-Based Access Control (RBAC): Azure Virtual Desktop utilizes Azure RBAC to assign roles to users and admins, helping you manage who has access to what within your environment. Make sure to assign the appropriate roles to control access to host pools, app groups, and workspaces.
-
Monitor and Adjust Access as Needed: Regularly review who has access to your Azure Virtual Desktop resources. Adjust these access rights as necessary to accommodate changes in your organization, such as onboarding new employees or changing the roles of existing staff.
By carefully managing who has access to your Azure Virtual Desktop applications and resources, you can enhance security, reduce administrative overhead, and ensure a seamless experience for all users.
Monitoring and Troubleshooting
Monitoring Performance
To effectively monitor your Azure Virtual Desktop (AVD) environment, you’ll need to set up Azure Virtual Desktop Insights using Azure Monitor Workbooks. For a broader guide on building monitoring views in Azure, see our step-by-step guide to building Azure dashboards. Begin by ensuring your AVD environments are updated to the latest release compatible with Azure Resource Manager and have a designated Log Analytics Workspace configured. This workspace should be dedicated to your AVD session hosts to accurately collect performance counters and events.
-
Install Azure Monitor Agent: Install this agent on all session hosts in your host pool to collect necessary data.
-
Enable Data Collection: Configure your Log Analytics workspace to collect diagnostics, recommended performance counters, and Windows Event Logs from your AVD session hosts.
-
Monitor Azure Monitor Alerts: Keep an eye on alerts within your subscription to manage and respond to incidents effectively.
Performance metrics are crucial for understanding resource usage. Monitor the following components using Azure Monitor:
-
CPU Utilization %
-
Available Memory
-
Logical Disk Space Used %
-
Bytes Sent and Received Rate
Adjust the sampling rate in your Azure Virtual Desktop Insights configuration workbook to match your environment’s size and usage. This setup helps in identifying bottlenecks and ensuring efficient resource utilization.
Common Issues and Fixes
Troubleshooting common issues in AVD involves checking various components and logs:
-
Session Host Connectivity: Review event logs for connection problems, especially focusing on the Azure Virtual Desktop agent. Look for specific error IDs in the Event Viewer under Windows Logs > Application to diagnose issues like
INVALID_REGISTRATION_TOKENorENDPOINT_NOT_FOUND. -
Agent and Boot Loader Issues: If the Remote Desktop Agent Loader service is stopped, start it manually and check for registration failures. Common issues might include errors during agent installation or updates affecting connectivity.
-
Network and Endpoint Accessibility: Verify that all required URLs are accessible from your session host VMs. Blocked URLs can prevent successful connections to your AVD environment. Use network trace logs to identify and resolve these blocks.
-
Health Checks: Ensure your session host VMs pass necessary health checks like
UrlsAccessibleCheck,MetaDataServiceCheck, andMonitoringAgentCheck. Failure in these checks can lead to VMs being stuck in an ‘Unavailable’ or ‘Needs Assistance’ state. -
Resource Limit Monitoring: Keep an eye on Azure service limits and monitor the storage solutions for FSLogix profiles or App Attach shares to prevent exceeding thresholds that could degrade user experience.
By systematically monitoring performance and addressing common issues, you can maintain a robust and efficient Azure Virtual Desktop environment.
Conclusion
Through this comprehensive guide, we’ve explored the pivotal role Azure Virtual Desktop plays in facilitating remote work and its vast capabilities in providing secure, scalable, and versatile virtual desktop environments. From initial setup preparations, creating and managing host pools and session hosts, to configuring remote access and fine-tuning application delivery, this step-by-step guide has equipped you with the knowledge to efficiently implement and manage an Azure Virtual Desktop deployment. The strategic insights into monitoring and troubleshooting further ensure that you can maintain optimal performance and swiftly address any challenges, enhancing the reliability and user experience of your virtual desktop infrastructure.
As we conclude, the importance of Azure Virtual Desktop in today’s digital workspace cannot be overstated, offering solutions that not only boost operational flexibility but also align with comprehensive security measures and cost-efficiency goals. Embracing Azure Virtual Desktop positions organizations to thrive in the evolving landscape of remote work, providing the tools necessary to respond to changing business needs while ensuring seamless access and productivity for their workforce. As you move forward, remember that the journey to effective virtual desktop management is ongoing, with new developments and enhancements continually emerging to enhance its capability and integration within the modern workplace.
Need help deploying Azure Virtual Desktop? Exodata specializes in AVD setup, migration, and management for businesses of all sizes. Contact us to discuss your needs.
FAQs
1. What are the steps to set up an Azure Virtual Desktop? To set up an Azure Virtual Desktop, follow these steps:
-
Create a host pool.
-
Establish a workspace.
-
Form an application group.
-
Set up session host virtual machines.
-
Optionally, enable diagnostics settings.
-
Assign users or groups to the application group to provide access to desktops and applications.
2. Can you outline the process for creating a virtual desktop in Azure? Creating a virtual desktop in Azure involves several key steps:
-
Begin with setup and registration.
-
Create the Azure Virtual Desktop (AVD) host pool.
-
Configure the AVD host pool.
-
Test your AVD host pool.
-
Log into the Azure Virtual Desktop.
3. How do I create an Azure VM from scratch? To create an Azure Virtual Machine (VM), follow these steps:
-
Start by setting up your Azure Virtual Machine.
-
Choose a server image for your Azure VM.
-
Proceed with the creation of the Azure VM.
-
Complete the final deployment.
4. What is Azure Virtual Desktop and how does it work? Azure Virtual Desktop is a desktop and application virtualization service offered by Microsoft Azure. It operates on the cloud and supports various devices including Windows, Mac, iOS, and Android. This service allows users to access remote desktops and applications through fully-featured apps.
5. What is the initial step for deploying a virtual machine in Azure? The first step in deploying a virtual machine in Azure is:
-
Log into the Azure Management Portal.
-
Navigate to ‘Virtual Machines’ in the left panel and select ‘Create a Virtual Machine’.
6. How do I install the Azure Virtual Desktop app? To install the Azure Virtual Desktop app, follow these steps:
-
Visit the Azure Virtual Desktop Store app in the Microsoft Store.
-
Click on ‘Install’ to begin downloading and installing the app.
-
Once installed, open the app. It will automatically install the Azure Virtual Desktop (HostApp) dependency the first time it runs.
Need help with your cloud strategy? Exodata helps businesses design, migrate, and manage cloud environments on Azure and AWS. Contact us to discuss your goals.